
Skill Level: Beginner
Time: 30 minutes
Hi everyone, it’s Jessica here. Quick & easy cards are so fun to make, and they are perfect for holiday mass production too! I made several versions today using some punches, and I hope you’ll enjoy this quick tutorial.

Step 1:
Use Stampin’ Up!’s Gleaming Ornaments punches with patterned paper to create the christmas ornaments. Each ornament needs two pieces; one unscored and one scored in the middle.
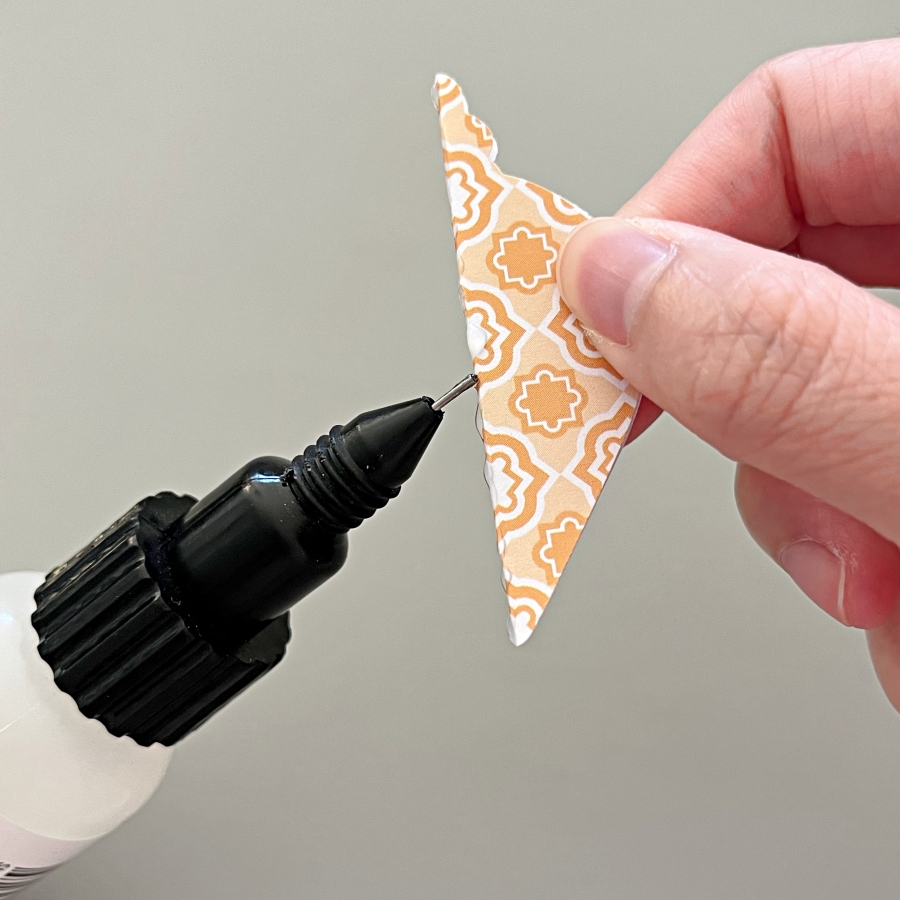
Step 2:
Apply On Point Glue onto the folded crease (backside of the patterned paper) and adhere to the unscored punch piece. Hold in place for 20-30 seconds while the glue dries.
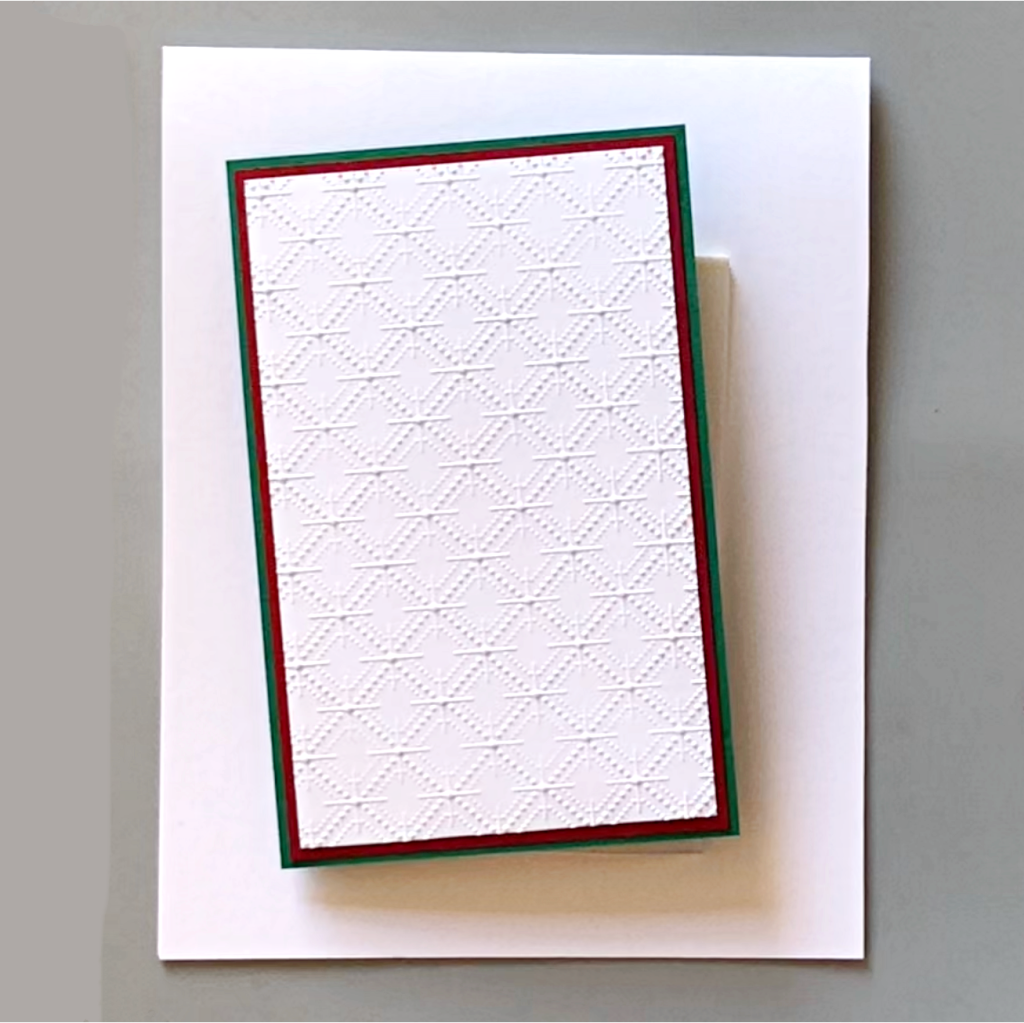
Step 3:
Prepare 3 pieces of cardstock and adhere them together with Tear It Tape. The largest size measures 2 3/4‘’ x 4 1/4‘’, the medium size measures 2 5/8‘’ x 4 1/8‘’, and the small size 2 1/2‘’ x 4’’.
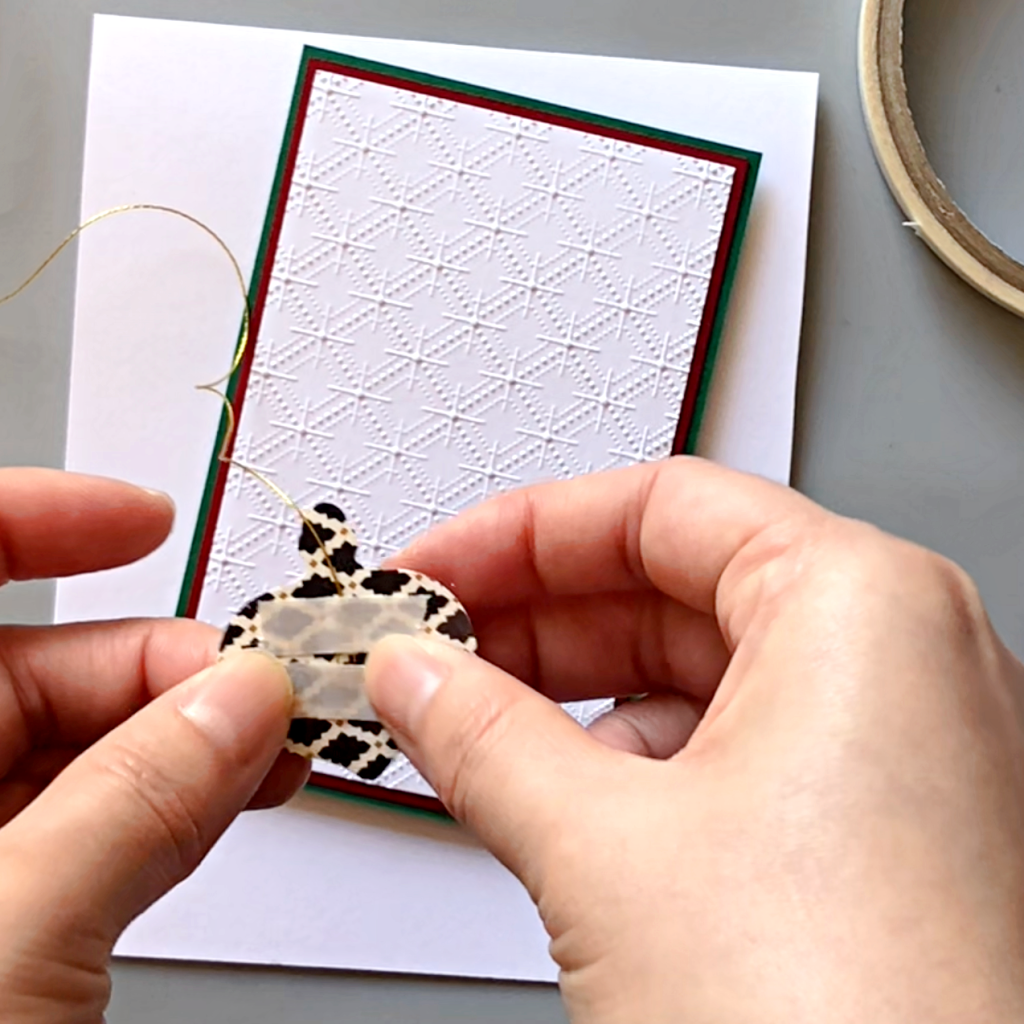
Step 4:
Attach a piece of gold thread to the back of the ornament with Tear It Tape, and adhere to the layered background. Attach the other end of the gold thread to the back of the green cardstock layer.

Step 5:
Adhere tiny bows to the top of the ornaments with glue dots.
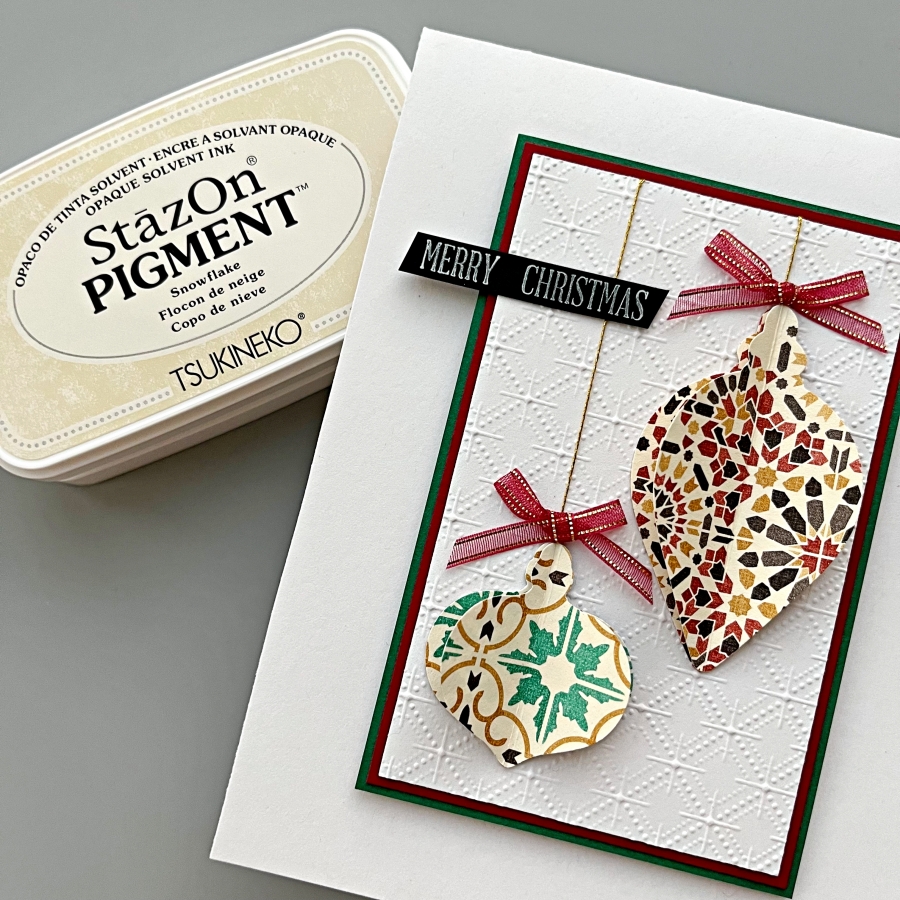
Step 6:
Stamp the sentiment on black cardstock using StazOn Pigment ink. Adhere both the sentiment strip and the layered panel to the card base with Tear It Tape.
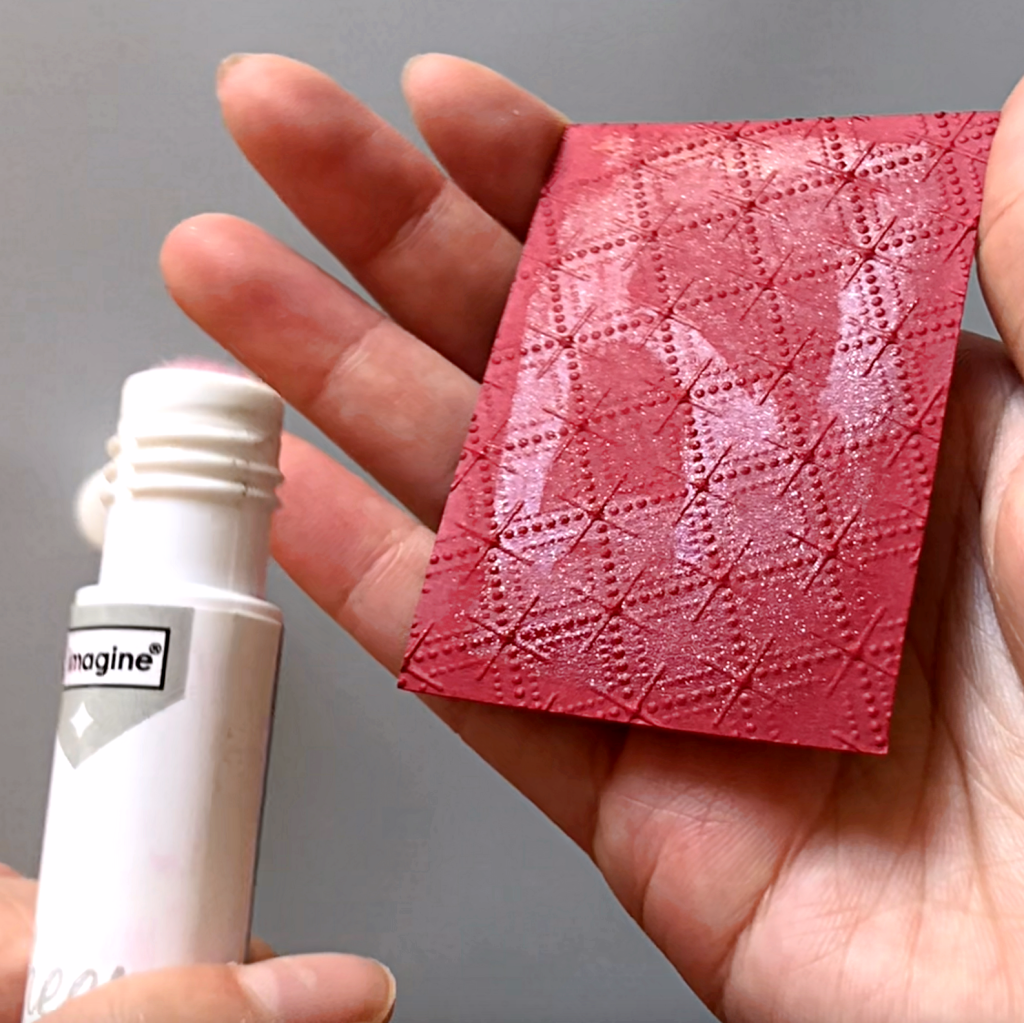
Step 7:
For the second version of the christmas card, I used the negative pieces from the punches and layered red, embossed cardstock underneath. Generously apply the Sheer Shimmer Stix in sparkle to add additional shimmer.
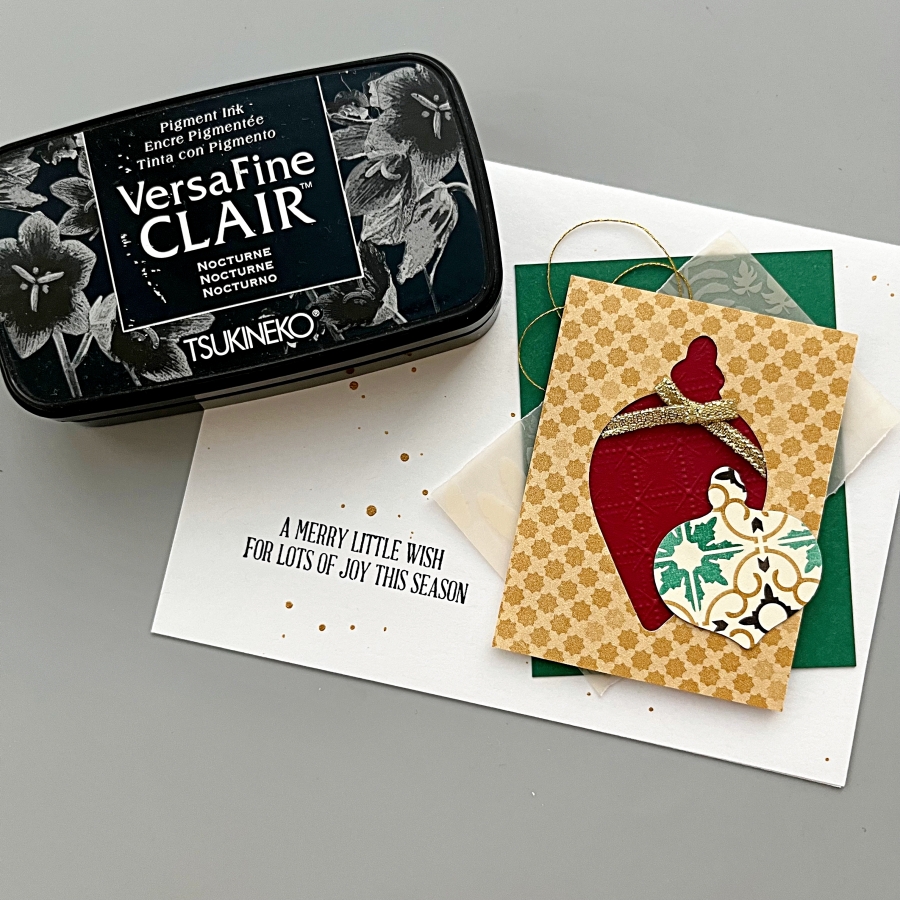
Step 8:
Adhered the patterned paper pieces onto the card base and stamp the sentiment using VersaFine Clair Nocturne ink. For a finishing touch, splatter on gold acrylic paint with a paint brush.
Imagine Supplies:
Other Supplies:
- Stampin’ Up! – Punch – Gleaming Ornaments Punch Pack
- Stampin’ Up! – Stamps – A Wish for Everything
- We R – Tool – Precision Press
- Gold thread
- Thin red ribbon
- Glue Dot
- White, green, red, black cardstock